English
Getting started
From sign-up to a QR code on the table
Here is how to set up Nomilist for your venue, in six steps. Guests can use it the same day. If you get stuck, email us at the address at the bottom of this page.
Step 01
Sign up
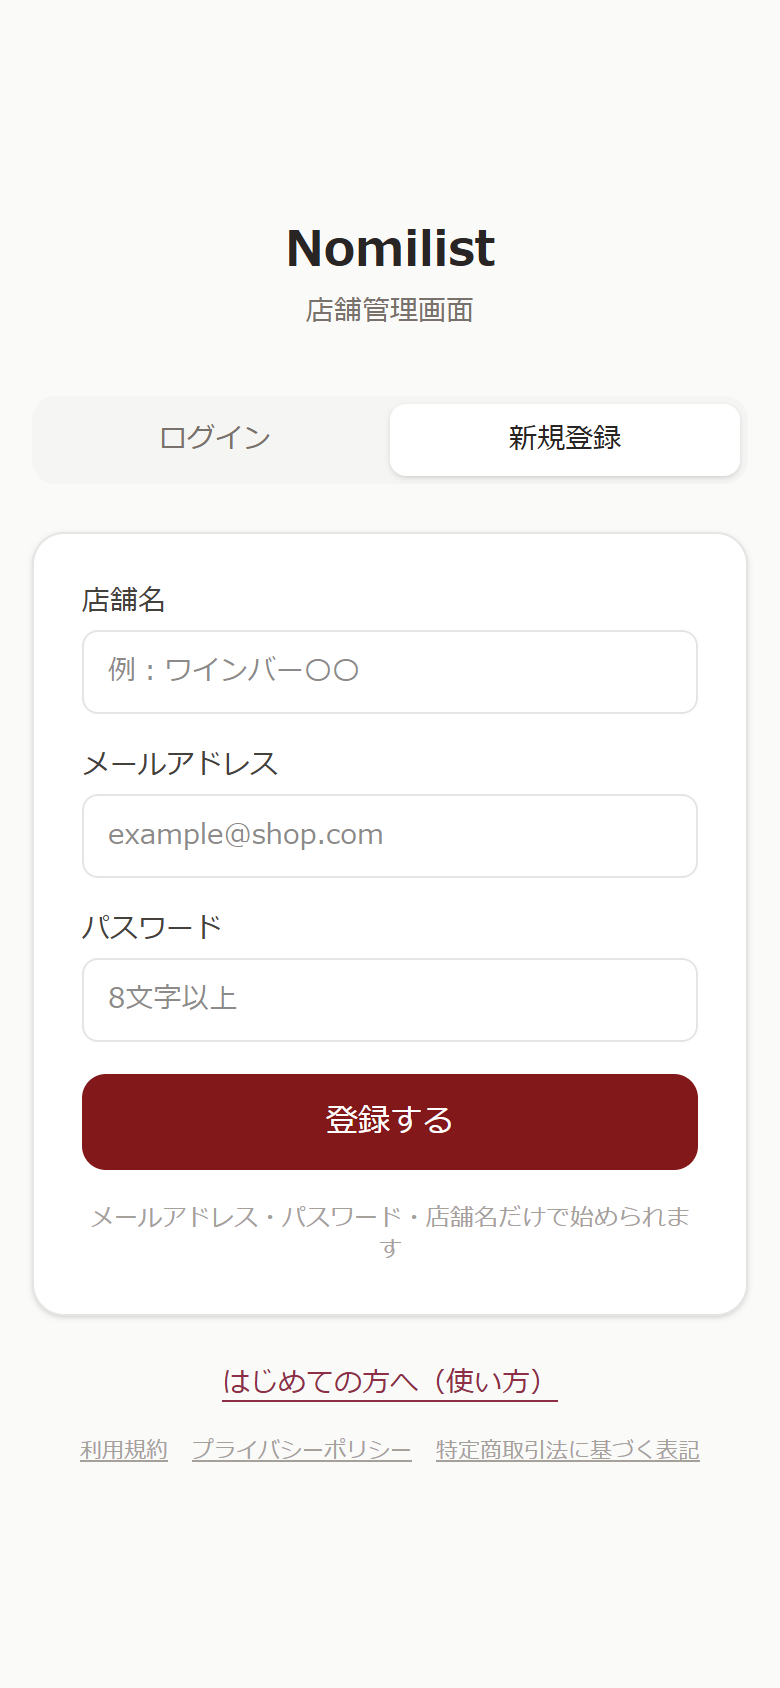
On the login screen, choose sign-up, then enter your venue name, email and a password. We send you a confirmation email: open the link in it to log in. No credit card is needed for the free plan.
- The sign-up screen is currently in Japanese: the three boxes are venue name, email and password (8 characters or more), and the red button signs you up.
- Your venue name appears at the top of the guest view and on printed menus. You can change it later.
Step 02
Add your drinks
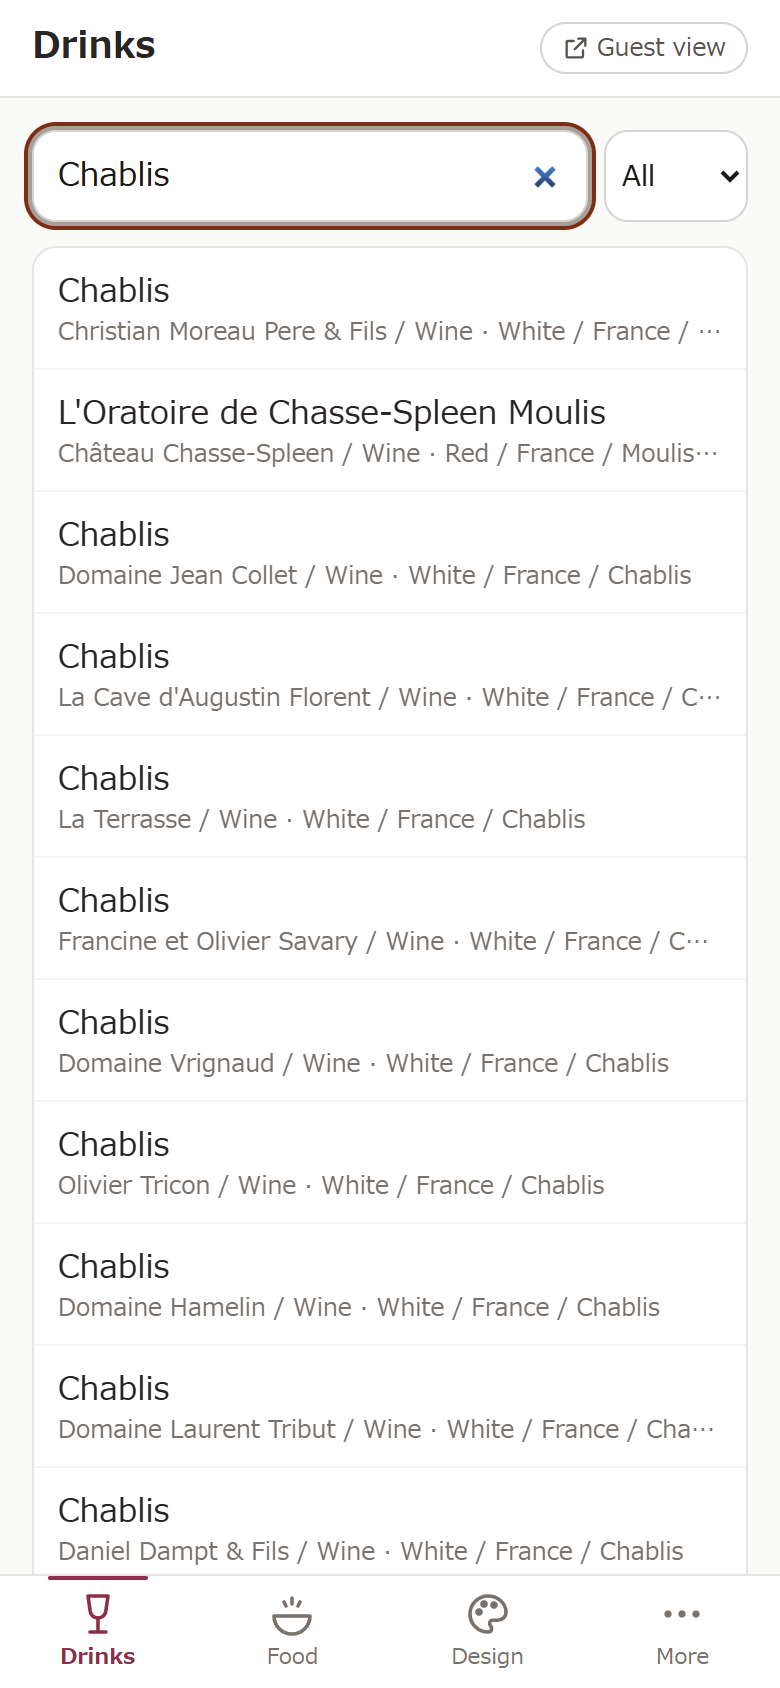
On the Drinks screen, start typing a name in the search box and matching drinks appear. Pick one, enter the glass or bottle price, and it is on your list. Tasting notes and pairings are written for you.
- Not in the suggestions? Use the last line, which adds what you typed as a new drink, and enter its name and type.
- Mark a bottle as sold out with the switch. Change the order with the arrows.
- The free plan includes up to 10 drinks.
Step 03
Add your dishes
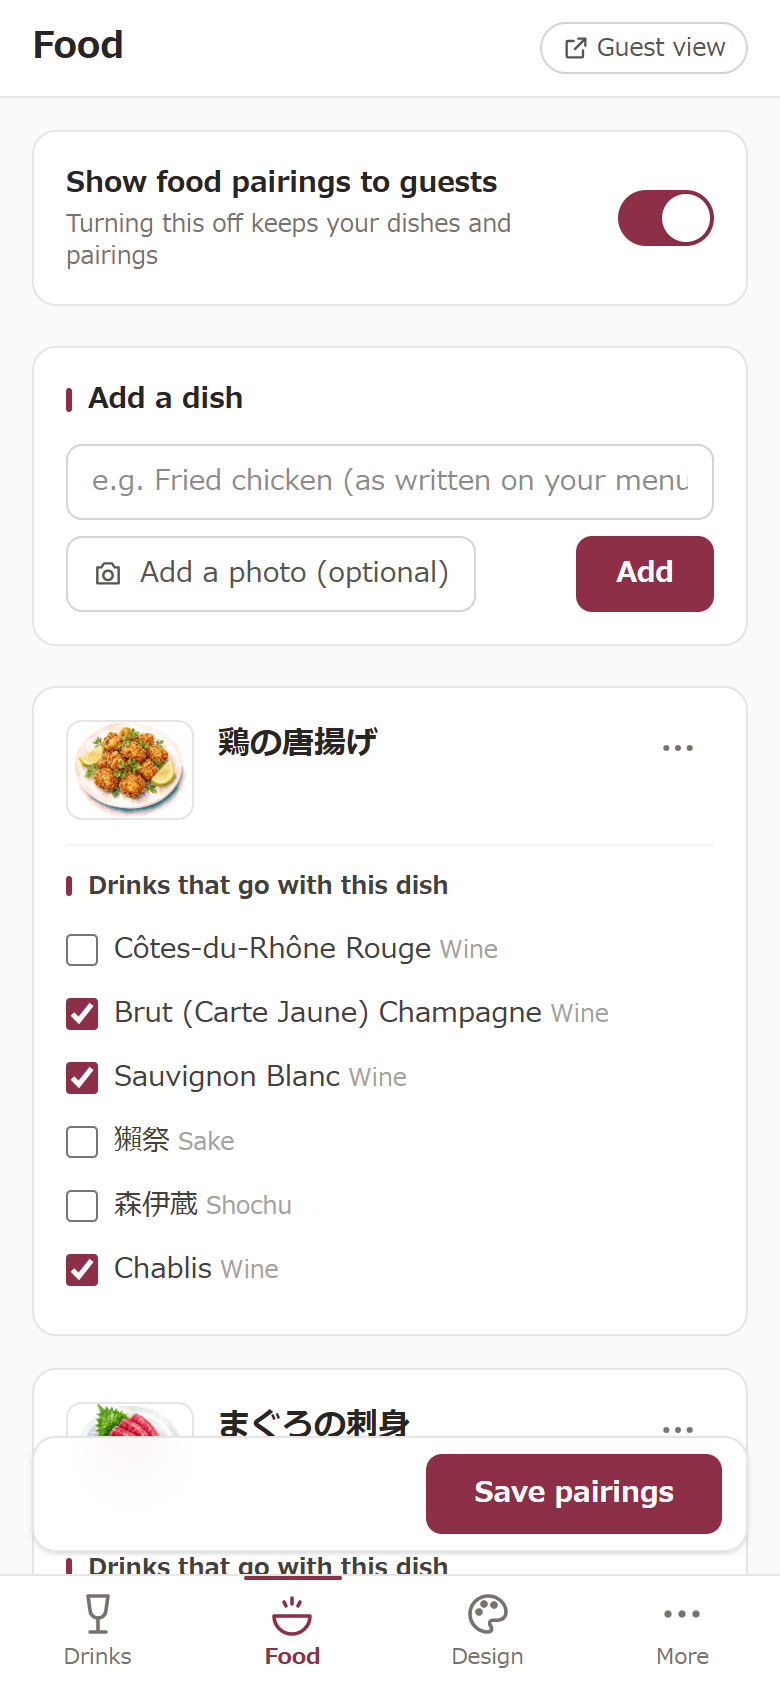
On the Food screen, type a dish name the way it reads on your menu and tap Add. Tick the drinks that go with each dish and save the pairings. Guests can then start from a dish and find a drink.
- A photo is optional. Without one, an illustration is used.
- The free plan includes up to 3 dishes.
Step 04
Choose a look
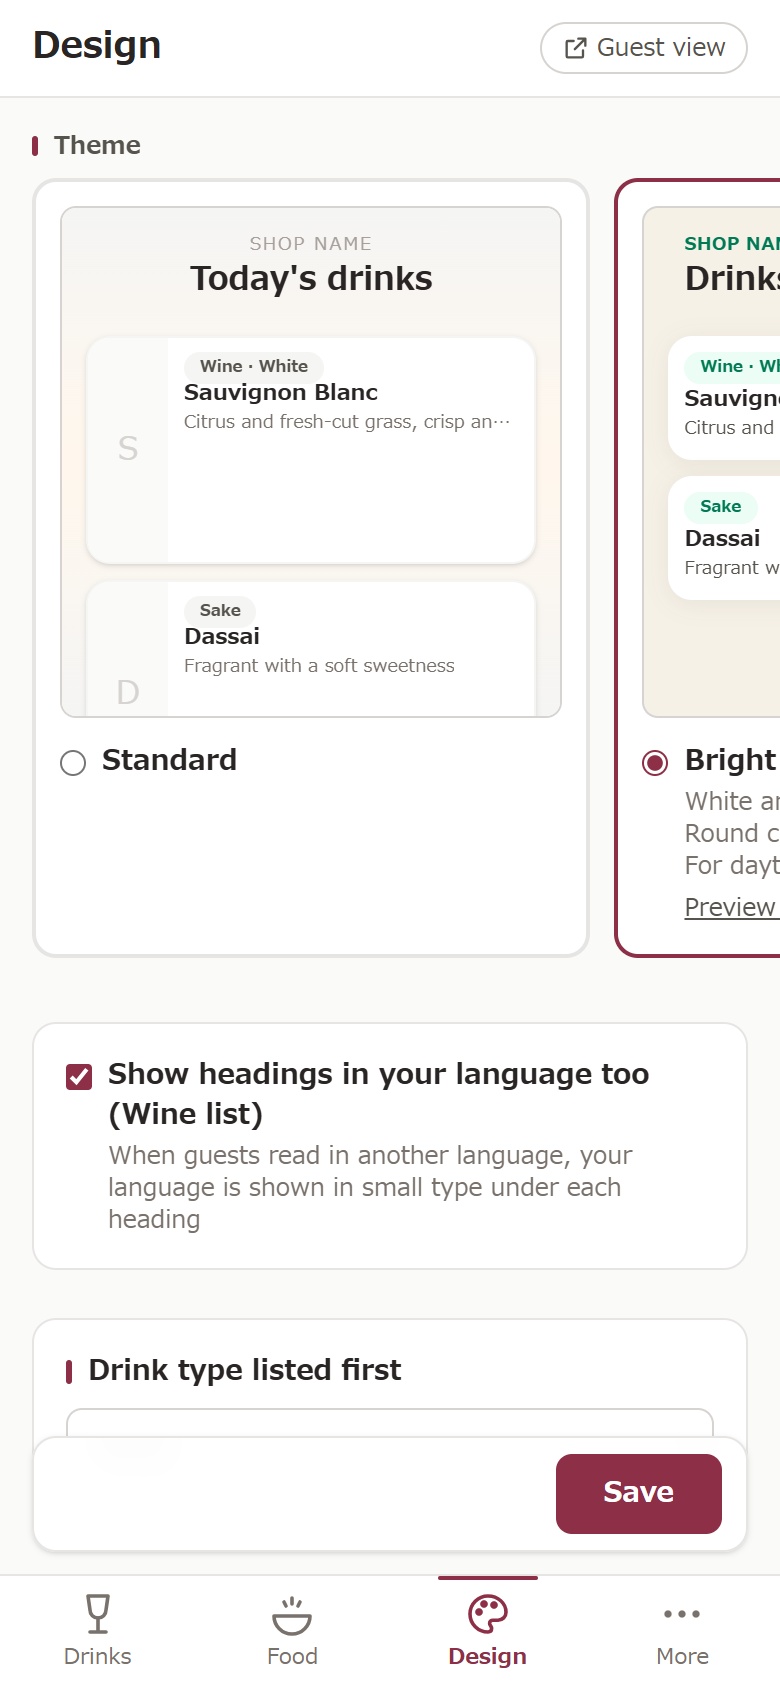
On the Design screen, pick the design that suits your venue and save. Each design has a link to preview it in the guest view first.
- You can change the design any time. There is no need to reprint the QR code.
Step 05
Print your QR code
Print the QR card that goes on each table. There are three ways to do it, below. No printer? Save it as a PDF and have it printed elsewhere.
What to print
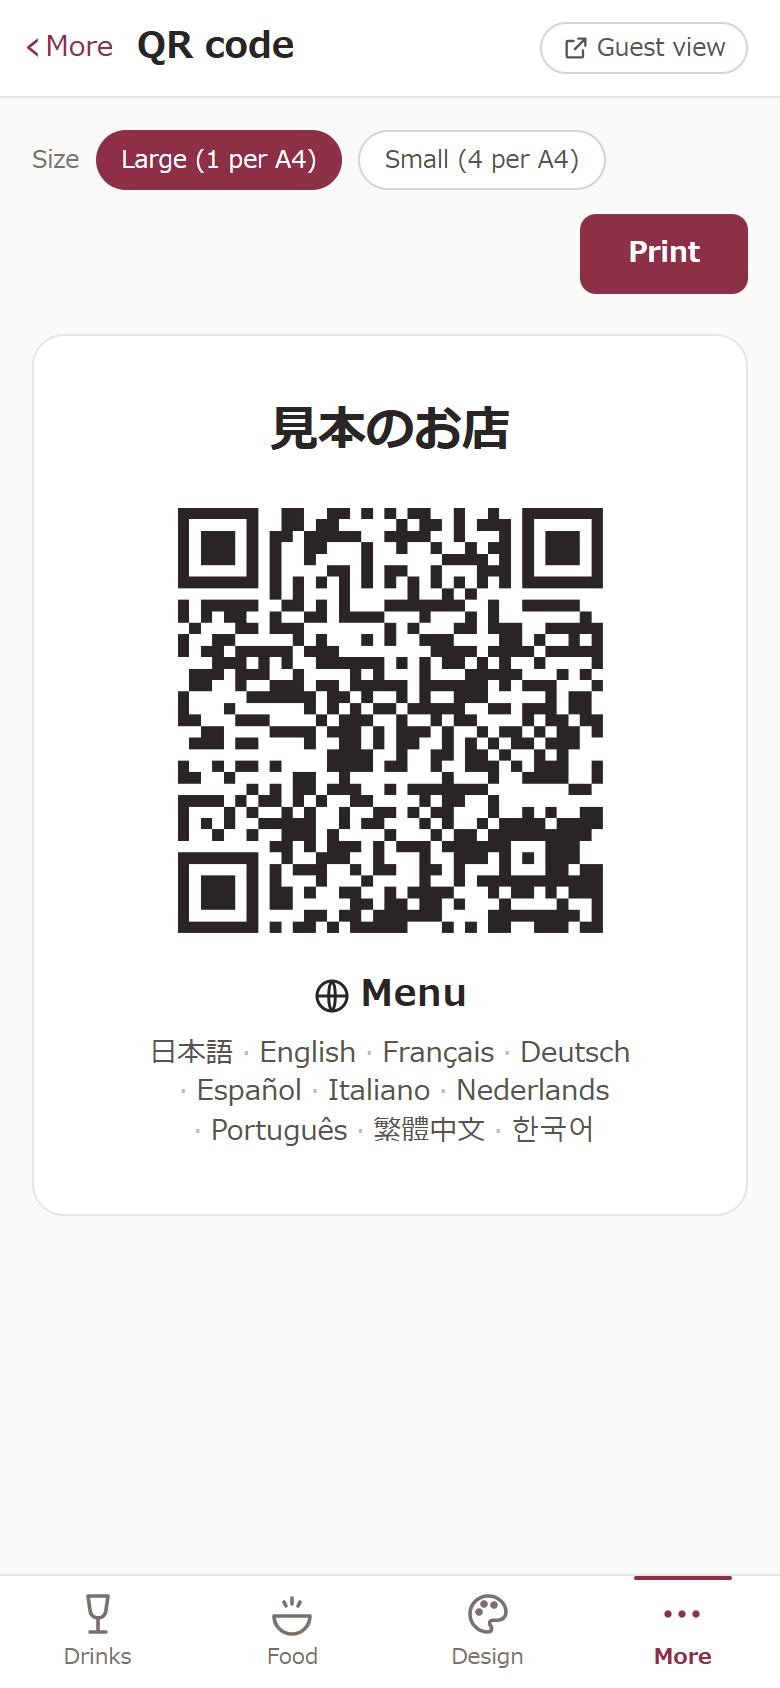
- Table cards: More, then QR code. Choose Large (1 per A4) or Small (4 per A4, cut apart), then tap Print.
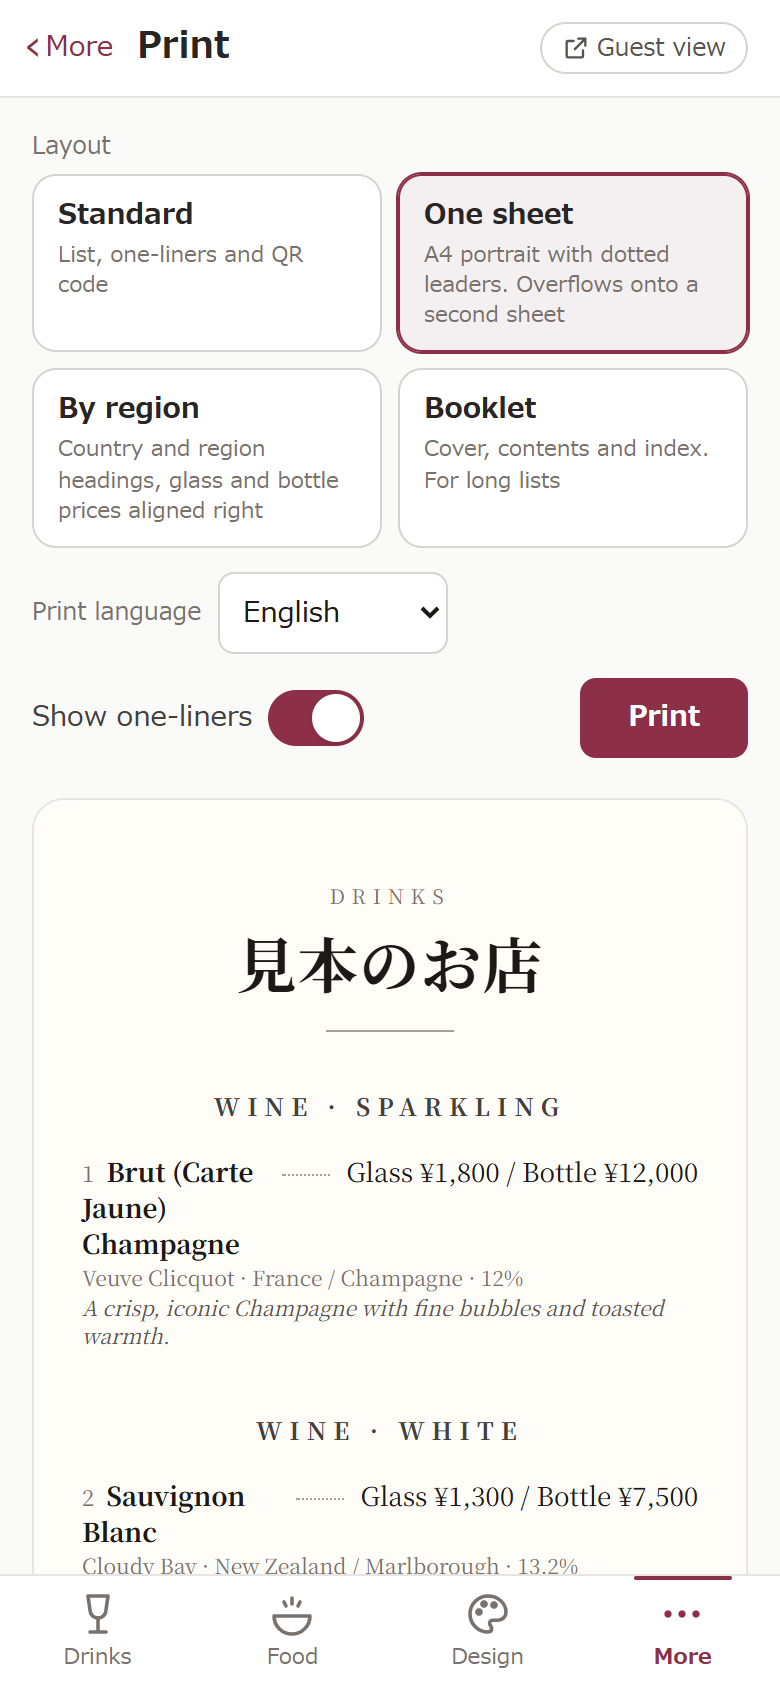
- A printed menu, only if you want one: More, then Print. Choose one of four layouts (Standard, One sheet, By region, Booklet), pick the print language, then tap Print.
How to print (pick whichever is easiest)
A.On your own printer
Tap Print on your computer or phone and the print dialog opens. Choose your printer, keep the paper at A4 (or Letter) and the scale at 100%, and print.
B.Save as PDF
Tap Print, then choose PDF instead of a printer. In Chrome, set the destination to Save as PDF. On Windows, choose Microsoft Print to PDF. On a Mac, use the PDF menu at the bottom left and Save as PDF. On iPhone and iPad, use the share button in the print screen and Save to Files. You can email the PDF or print it later.
C.At a print shop
Take the PDF to any print or copy shop, on a USB stick or by email. In Japan, convenience stores print PDFs too: netprint (printing.ne.jp) at 7-Eleven, and Network Print (networkprint.ne.jp) at Lawson, FamilyMart and Ministop.
Printing does not work inside apps such as LINE or Instagram. If you opened the dashboard there, tap Copy URL and open in a browser, then paste it into Safari or Chrome.
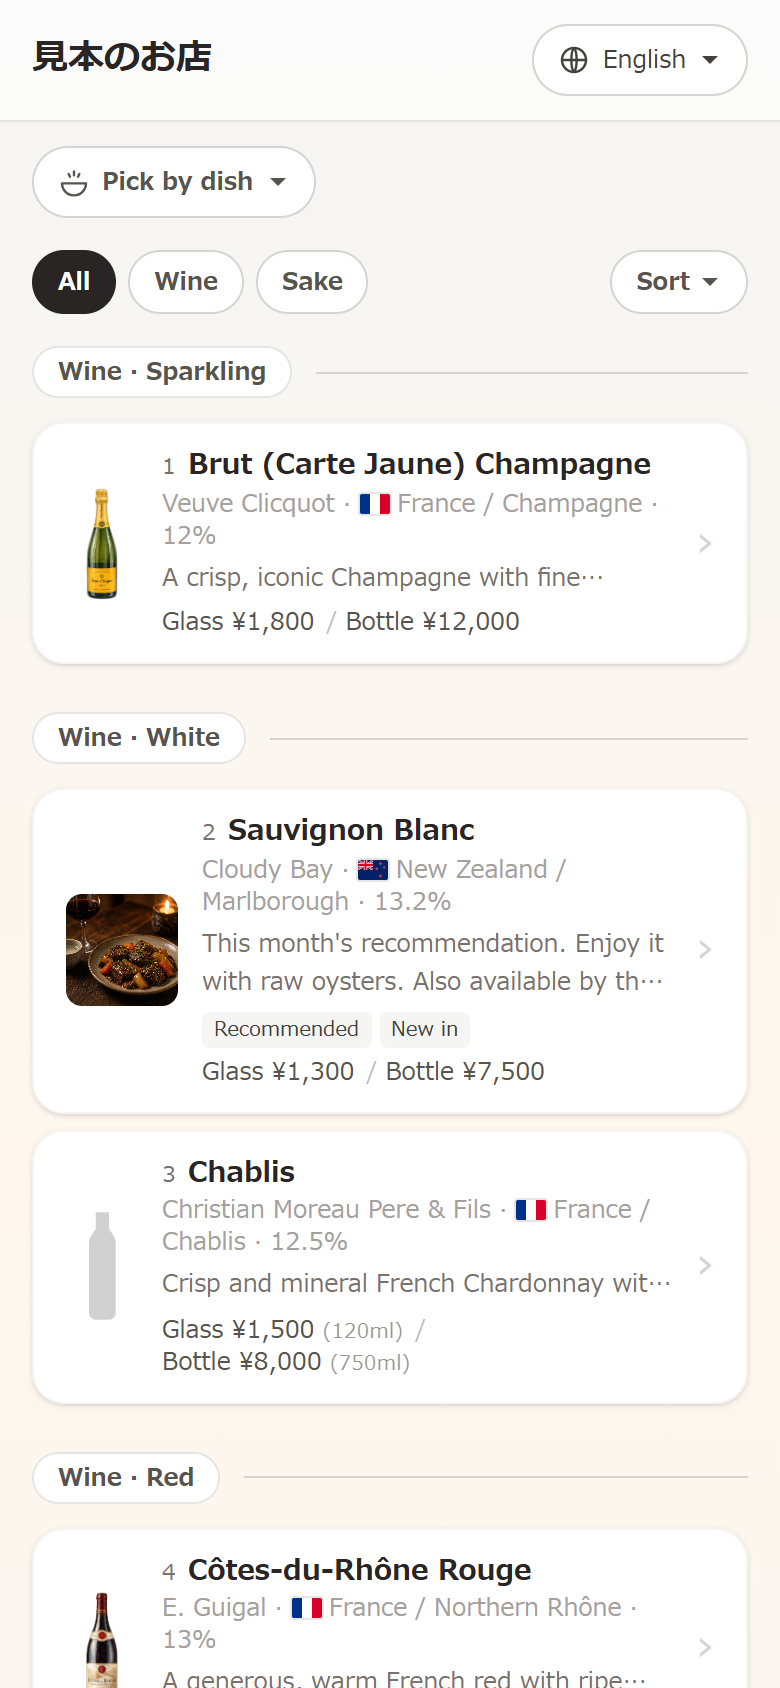
Before you print, scan the QR code on the screen with your phone and make sure your list opens.
Step 06
Put it on the table
Put the QR cards on your tables or bar and you are ready. Guests scan with their phone camera and the list opens in the browser. No app to install.
- Change a price or mark something sold out, and guests see it the next time they scan. Nothing to reprint.
- On the free plan the list shows in one language. Upgrade to show it in every language.
Start free. Add your first bottle.
Questions? Email us at koma.support117@gmail.com. Or send a photo of your current list or a spreadsheet, and we will enter it for you.